
In this article we want to show the possible causes and solutions to the problem "Error cooler temperatures."
Fuser temperature error can occur due to heating lamps, thermal sensor, thermal fuse rupture. Clear the fault finding no reason because of which it occurred is possible, but the printer can not work for a long time and show once again that error after a while.
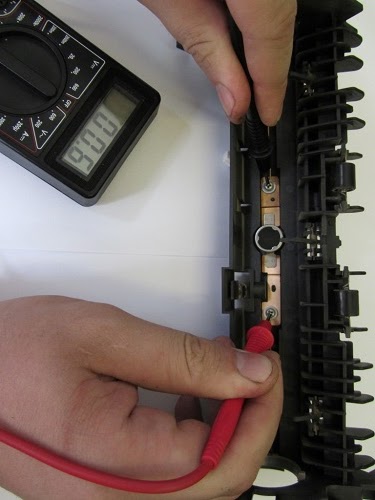
Broken heating lamp can be determined by its prozvoniv multimeter Figure 1. If the bulb is broken will only be replaced.

The temperature sensor must be clean and it also need to ring Figure 2.3. If you find a dirty sensor, then clean it with acetone.


Explosive thermal fuse as well prozvanivatsya multimeter Figure 4. To repair it you have to shake it well, for example to hit him on the floor.
If everything is in order, you should clear the error by pressing the buttons in the following sequence:
Xerox 3100 fax:
Press the "Menu" or the down button.
Press "*"
Press the "#"
Click "OK"
Change the SOS1 c "00100001" to "10100001"
Click "OK"
Press the "Stop"
Press the "Menu" or the down button.
Press the "#"
Press the keyboard letter "T" shown in Figure 5.
Turn off, turn on the printer.
Try printing one page.
Press the "Menu" or the down button.
Press "*"

Xerox 3100 Fax no:
Press the "Menu" or the down button.
Press "*"
Press the "#"
Click "OK"
Change the SOS1 c "00100001" to "10100001"
Click "OK"
Press the "Stop"
Press the "Menu" or the down button.
Press the "#"
Click on the "8-TUV" Figure 6.
Click "OK"
Turn off, turn on the printer.
Try printing one page.
Press the "Menu" or the down button.
Press "*"
Press the "#"
Click "OK"
Change the SOS1 c "00100001" to "10100001"
Click "OK"
Press the "Stop"

If you could not clear the error the first time, repeat the procedure again.


